Replace Domain Controller With Same Hostname and IP Address
We have a large number of network devices at work that are using our Domain Controllers for DNS resolution, RADIUS and DHCP. As well as a number of on premise systems which are binding to hostnames for LDAP authentication. Whilst it would totally be possible to go through all of these and change the configuration to use new servers, sometimes it’s just easier to replace the 2008R2 Domain Controllers with a new 2019 Domain Controller with the same hostname and IP address.
Below I’ll outline the steps I’ve taken to ensure this goes as smoothly as possible with the minimum amount of disruption.
Gather Existing Service Info
Firstly, you should figure out which services are currently being provided on the Domain Controller. We’ll need to back these up and restore them on the 2019 copy.
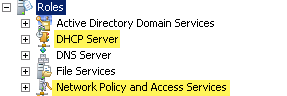
A good place to start is the Server Manager console under Roles. In the screenshot below, we can ignore Active Directory Domain Services and DNS as these are going to be installed and restored via the Domain Controller promotion process with values from the existing AD domain.
The DHCP Server and Network Policy and Access Services (NPS/RADIUS) are a different story though, we’ll want to back up the configuration of each of these and restore them on the new server.
File Services is listed, but we’re not using any file shares (other than SYSVOL/NETLOGON) on this server, so we don’t need to worry about this one either.
Back Up Existing Services
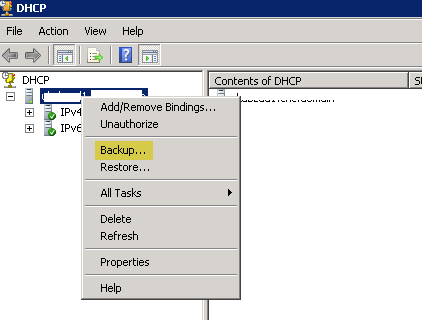
To backup DHCP (all existing scope sessions and the lease DB), open the DHCP management console from Administrative Tools. Once opened, right click the server name and select Backup. Choose a location for your backup (a network location would be preferable as we’ll be wiping this server soon…).
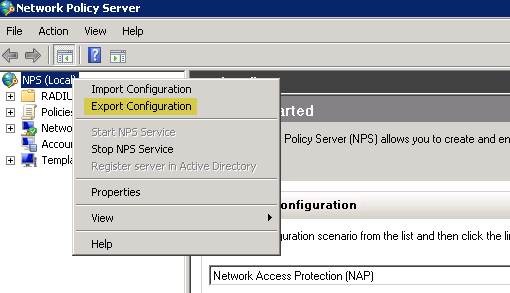
To backup Network Policy and Access Services (NPS/RADIUS), open the Network Policy Server management console from Administrative Tools. Once opened, right click NPS (Local) and select Export Configuration, again choosing a network location for your backup file.
Other Considerations
If you really want to minimise disruptions, there are a few other considerations to take. If a large number of clients are using the server as a primary DNS server, you may wish to point these to another Domain Controller on site. For example changing the existing DHCP scope options to update the primary DNS server (you’ll want to give this at least 24 hours to propogate to clients). If you have a large number of servers that you need to change the DNS settings on and you’re running them under VMWare, take a look at this article for a handy script.
Take a note of your existing TCP/IP settings, we’ll need to restore these on the 2019 server.
Demote the Domain Controller
Once you’re happy you have a backup of all the services the Domain Controller was providing, we’re ready to demote the controller.
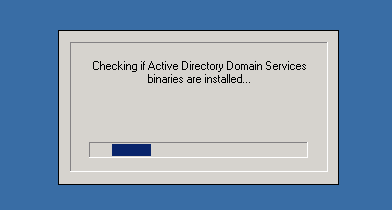
From an administrator command prompt, run dcpromo. You’ll see it checking for the binaries before starting the demotion wizard.
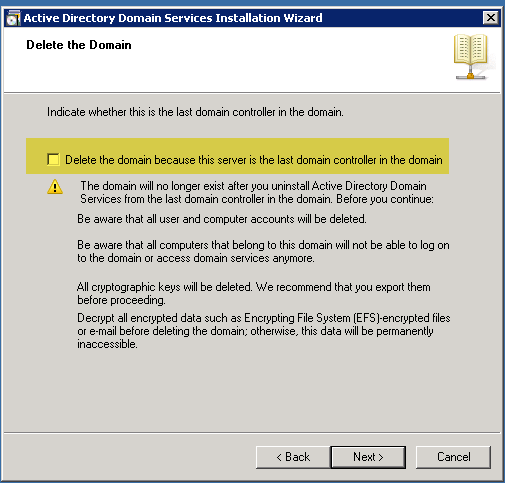
Demote the domain controller as normal, ensure that you do not select ‘Delete the domain’. You’re going to have a very bad day/week if you choose this option!
Once the demotion process is complete and the server has rebooted, we’re going to disjoin it from the domain and delete the computer account from AD. Once the computer account has been deleted it’s important that you allow this change to replicate to all of your other Domain Controllers.
Now either wipe the server (if physical) and install Server 2019, or shutdown the old VM, and spin up a new Server 2019 VM.
Promote the New Server 2019 Domain Controller
Change the hostname on your new 2019 server to match the original hostname from the old server. Also change the TCP/IP settings (that we noted earlier) to match the old server. After the server has rebooted for the domain join, we’re going to need to install the Active Directory Domain Services role in order to promote the server to a Domain Controller.
From Server Manager, select Add roles and features from the Dashboard. From here install Active Directory Domain Services under the Server Roles section.
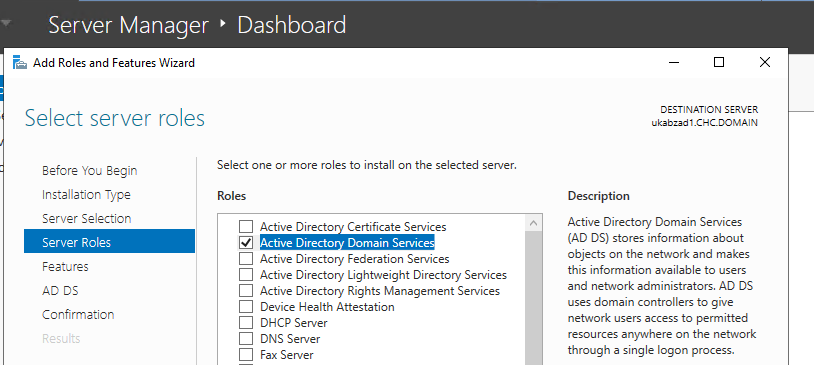
Once ADDS has finished installing, the notification flag at the top right hand side will present an option to Promote to Domain Controller. Choose this and follow through the wizard.
The server will reboot upon completion and will once again be a functional Domain Controller.
Restore DC Services
Now that we have the Domain Controller back in place, we’ll want to restore any services that we backed up earlier. In our case this was DHCP and NPS. Back in Server Manager, choose Add roles and features again, this time selecting DHCP Server and Network Policy and Access Services.
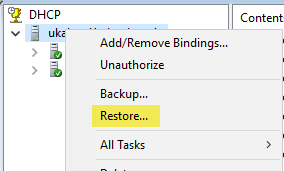
First we’ll restore the DHCP configuration and lease database. Open DHCP from Administrative Tools, right click the server name and select Restore. Expand your ipv4 and ipv6 sections and ensure all of your scope configurations and leases are present again.
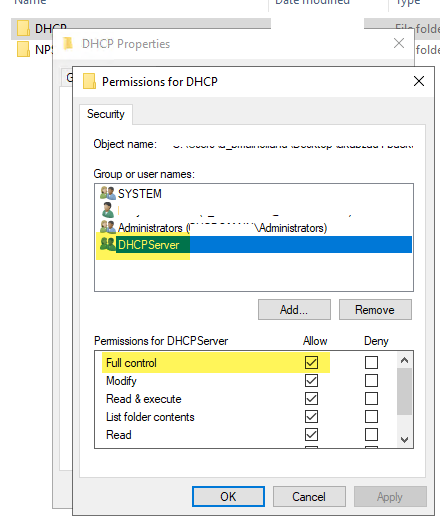
If you get an error when restoring the DHCP backup regarding permissions, locate your backup folder and modify the permissions, granting DHCPServer Full Control
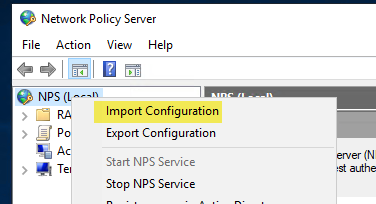
Next to restore NPS, open Network Policy Server from Administrative Tools. Right click the NPS (Local) and choose Import Configuration. Select your NPS XML backup file from earlier. Look under Radius Clients and ensure all your entries are present again.
And with that we’re done!